Showing posts with label 28mm. Show all posts

Saturday, March 5, 2011

Preparing for Little Wars

I'll be running a game at Little Wars again this year on Saturday, April 9. Last year I did the Battle of Ligny. This year, I'll be doing the Battle of Gettysburg: Day 2. The rules will be my Civil War adaptation of Command and Colors: Ancients.

Preparation:

  • I've ordered new buildings to increase the number if my Civil War era buildings (which look different from Napoleonic era buildings). My building scale is 6mm, which may seem odd with 28mm figures, but I'm trying to create a tabletop that represents the entire battlefield, which would be impossible with 25mm buildings. I figure that since each figure represents approximately 300 men, that it actually makes sense that the figures are over-sized.
  • I purchased and based alot of trees
  • I purchased and flocked quite a few new hills
  • I also commissioned a few new units and casualty figures from Scott MacPhee (the genius figure painter who did all of my Civil War figures earlier this year.
  • I researched the orders of battle and starting positions of all units: Each infantry stand is equal to approximately 2 brigades.
  • The final step was to do a dry-run setup on my table. Here are some pictures:
The Luthern Seminary (great building from Total Battle Miniatures in the UK)


Notice the new casualty figures. I plan to place one on the table every time a unit is eliminated. That way, as the battle goes on, and units come off the table, it won't look as empty, and it will be apparent where the hard fighting took place.


Confederate troops of Rodes Division waiting in Gettysburg for their chance to storm Cemetery Hill.

Tuesday, April 13, 2010

Ligny (pt 2)

My first aggressive move, was pretty aggressive. I launched a major infantry attack with Vandamme's Corps on my left flank. 4 Infantry Divisions, 1 Cavalry Division, and Artillery headed right at St Amand and La Haye. Paul's Prussians resonded aggressively and counter-attacked to punish me for trying to cross onto his side of the brook. The battle swayed to and fro, but it became obvious that I could not sustain the attack into the heart of his position. His artillery was well sighted, and I had insufficient Cavalry to force the Prussians back. So, after inflicting good casualties on the Prussians (I eliminated 1 unit of Infantry, 1 of Cavalry, and 1 of Artillery for the loss of 2 Infantry units), I ordered an orderly withraw. The pictures above and below are taken of the staus quo after the attack.
Phase 2
Since Paul left the initiative to me, content to shore up his defense, my next move was to form up a huge Cavalry attack on my right flank (Groucey's Corps). I maneuvered 5 Cavalry (3 Dragoons, 1 Hussars, and 1 Lanciers), and 1 Infantry divisions into place and then charged across the brook into the assembled Prussian Cavalry made up of Landwehr and Uhlans. They fell back (evaded) and then counter-charged with great effect driving me back with loss.
Not to be discouraged, I regrouped and pressed the attack driving the Prussians back in turn. I lost 2 Dragoon units, and the Prussians lost 3 light cavalry units. The picture below shows my Hussars about to charge the enemy Horse artillery, and the last unit of Landwehr Cavalry backed up to the edge of the battlefield...one more shove, and it's bound to rout (especially because it's out of room to evade).


Once the last enemy cavalry and artillery on this flank is eliminated, all that remains is a few infantry units (2 landwehr and one regular) skulking about in the villages. They won't dare to move out with my cavalry roaming freely.


Phase 3
The day has worn on, and my reinforcements have finally shown up on the enemy's right flank (1 Division of Infantry and 1 of Light Cavalry (Chasseurs a Cheval) from D'Erlon's Corps. Upon their arrival, they pitch into the Prussian Cavalry that had been guarding the flank and rout it, taking possession of Wagnelee.


The enemy is shaken badly with both flanks in danger...now it's time to call up the Imperial Guard to secure the victory! My reserve (3 fresh units of Elite Infantry, 2 fresh units of uirassier, and 2 Heavy Artillery), starts to move forward to deliver the final blow and the enemy army breaks in anticipation of the hammerblow and flees the field!


The Battle of Ligny

The Battle of Ligny (pt. 1)

Finally received my new Prussian Army (painted by Fernando Painting Service in Sri Lanka), and got them all based up and ready for battle. So, naturally I wanted to get them on the gaming table. First blood would be drawn on the Ligny battlefield. My buddy Paul took the new Prussians onto the field, and I took the French.


Phase 1:

Paul pulled his forces forward to defend the Ligny brook, with an especially daunting concentration in the center. (Note the British Officers standing in as Prussians...I'll get those done this week).


So daunting as a matter of fact that I avoided it (other than moving some infantry into the village of Ligny to make sure that the Prussians didn't get too excited and drive into my center).


Saturday, November 14, 2009

British Waterloo Artillery


British Horse Artillery and Foot.

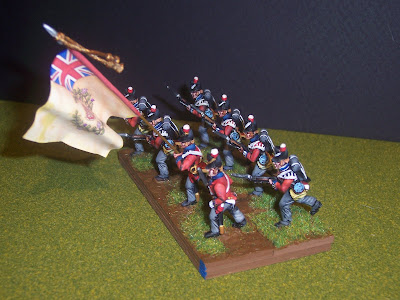
Waterloo British Infantry


I still have alot of work to do with finishing the bases (mud and grass).

The figures are Front Rank and the Flags are GMB

Units include British Line Infantry (flank companies), British Guard, Highlanders, Riflemen, and King's German Legion

Waterloo Allied Infantry


Allied Infantry from Waterloo, including troops from:
Nassau, Brunswick, Belgium, Holland, and Hanover

Figures are mostly Perry with the Hanovarians being Front Rank